Java
Your First Java Program: Java for Zombies
· Eric B.
This is part two of the Introduction to Java for Zombies series. Here you write, compile, and run your first Java program using NetBeans IDE.
All examples in this series use NetBeans on Windows 10. Download a current version from netbeans.apache.org (Apache now maintains NetBeans; the old netbeans.org redirects there). It is free.
Java programs are built from classes
Java is a pure object-oriented language. Every piece of code belongs to a class. A Java source file holds one or more class definitions, and one class must contain the main method for the program to start.
A Java source file looks like this:
class Class1 {
  // ...
}
class Class2 {
  // ...
}
class ClassN {
  public static void main(String[] args) {
    // ...
  }
}
For a program to run, it must contain a class with a main method declared as:
public static void main(String[] args)The class concept is the foundation of object-oriented programming. You will study it thoroughly in later posts. For now, focus on the structure: one class, one main method, one program entry point.
Write, compile, and run HelloWorld in NetBeans
The first program displays "Hello World!!!!" and exits. Follow these steps exactly.
Step 1: Launch NetBeans
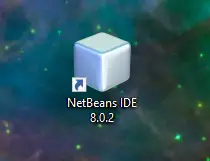
Double-click the NetBeans icon on the desktop to open the IDE.
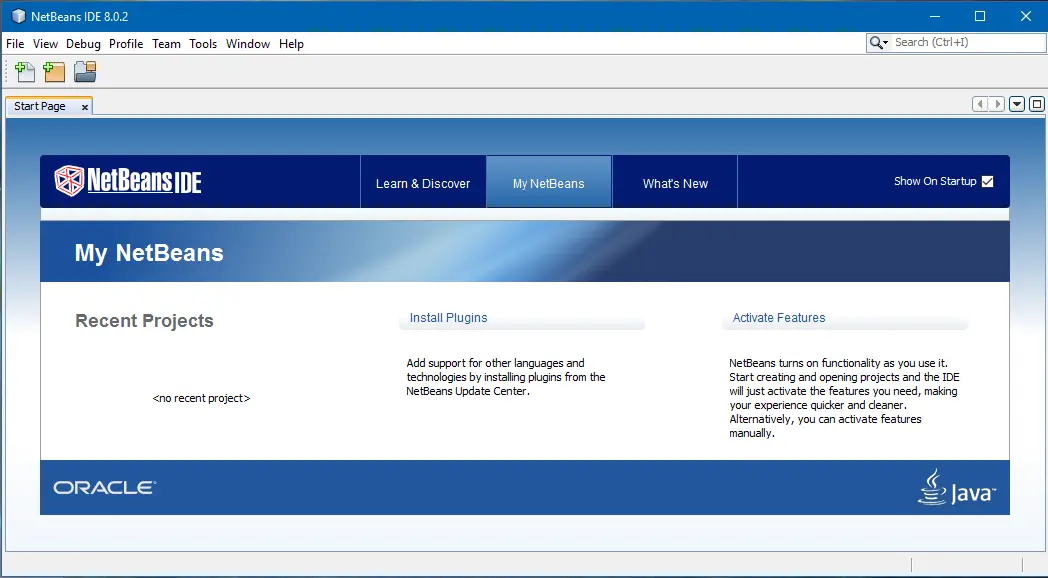
The NetBeans home page opens.
Step 2: Create a new Java project
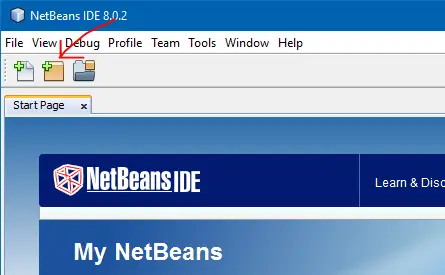
Go to File > New Project (or click the New File icon in the toolbar).
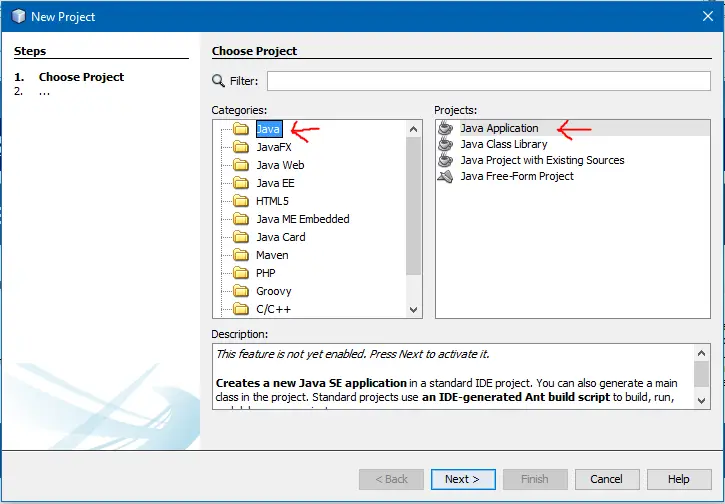
The New Project dialog opens. Select Java in the Categories pane and Java Application under Projects. Click Next.
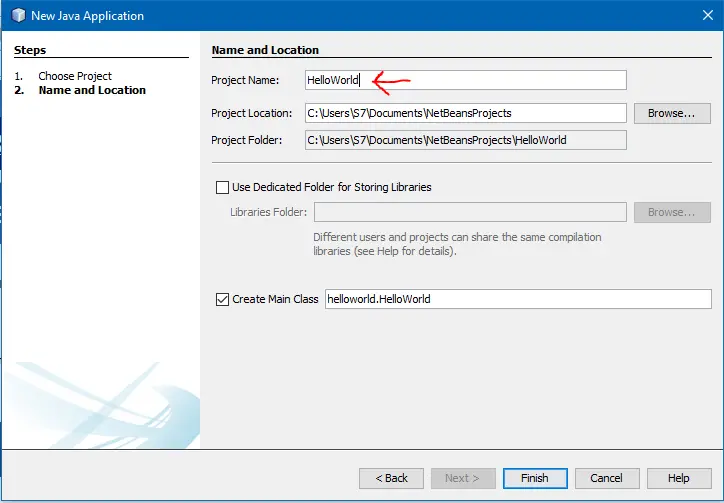
In the Name and Location step, set Project Name to HelloWorld. NetBeans fills in the Create Main Class field automatically as helloworld.HelloWorld. Leave Set as Main Project checked, then click Finish.
The project appears in the Projects tab. Open HelloWorld.java and type the following statement inside the main method:
System.out.println("Hello World!!!!");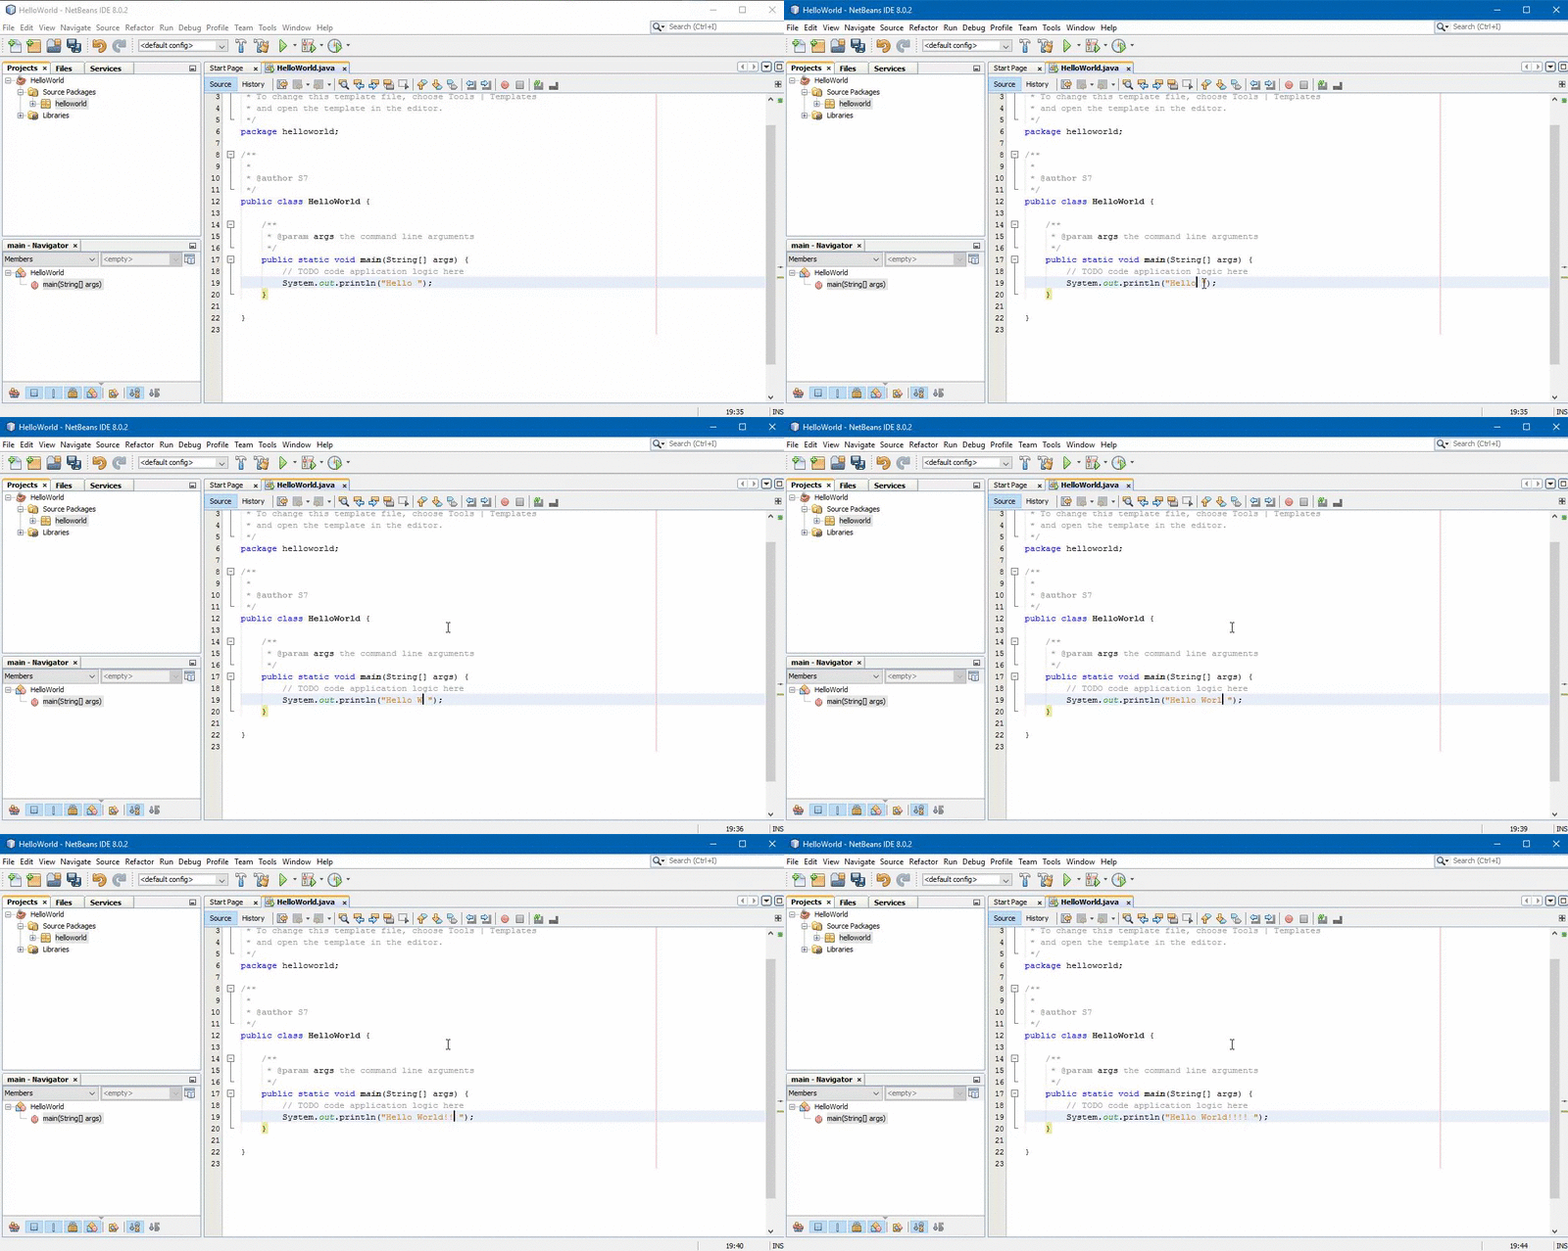
NetBeans checks your syntax in real time. Introduce a deliberate error, for example type voide instead of void, and the IDE highlights the problem immediately.
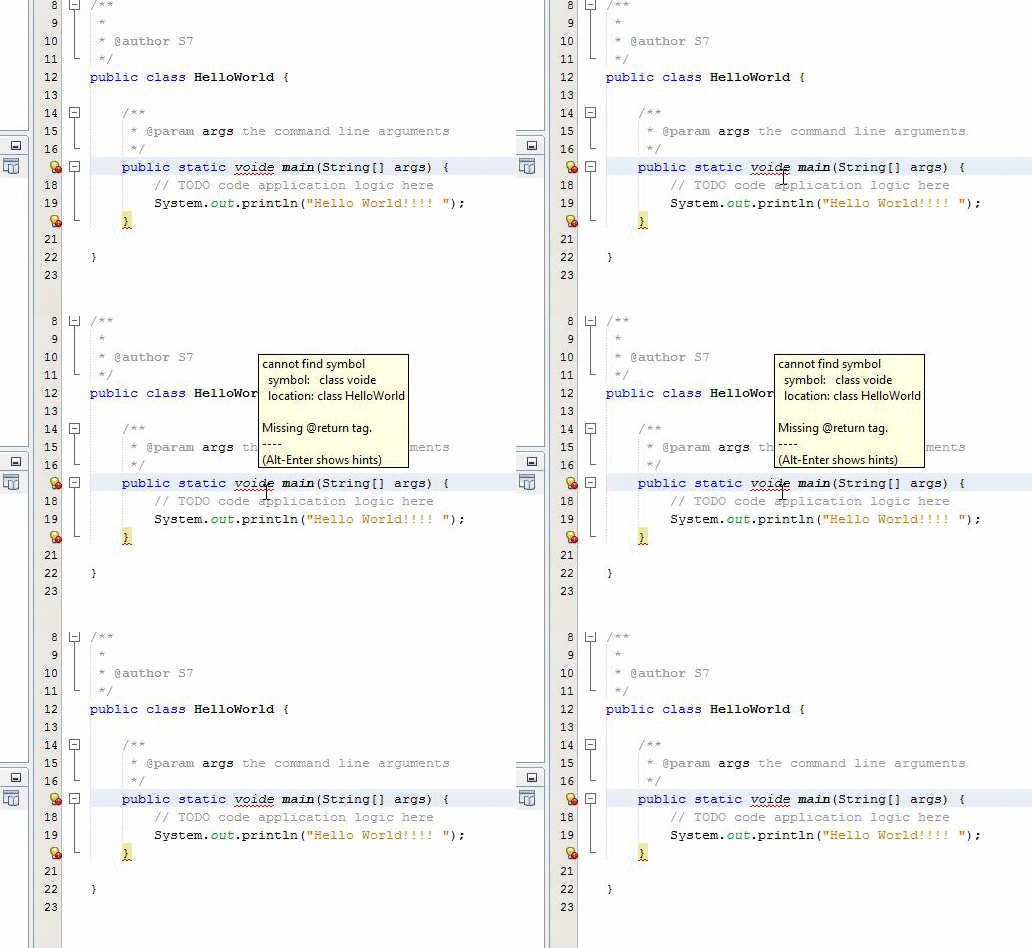
Correct the error before moving on.
Step 3: Run the program
Click the green Run button in the toolbar.
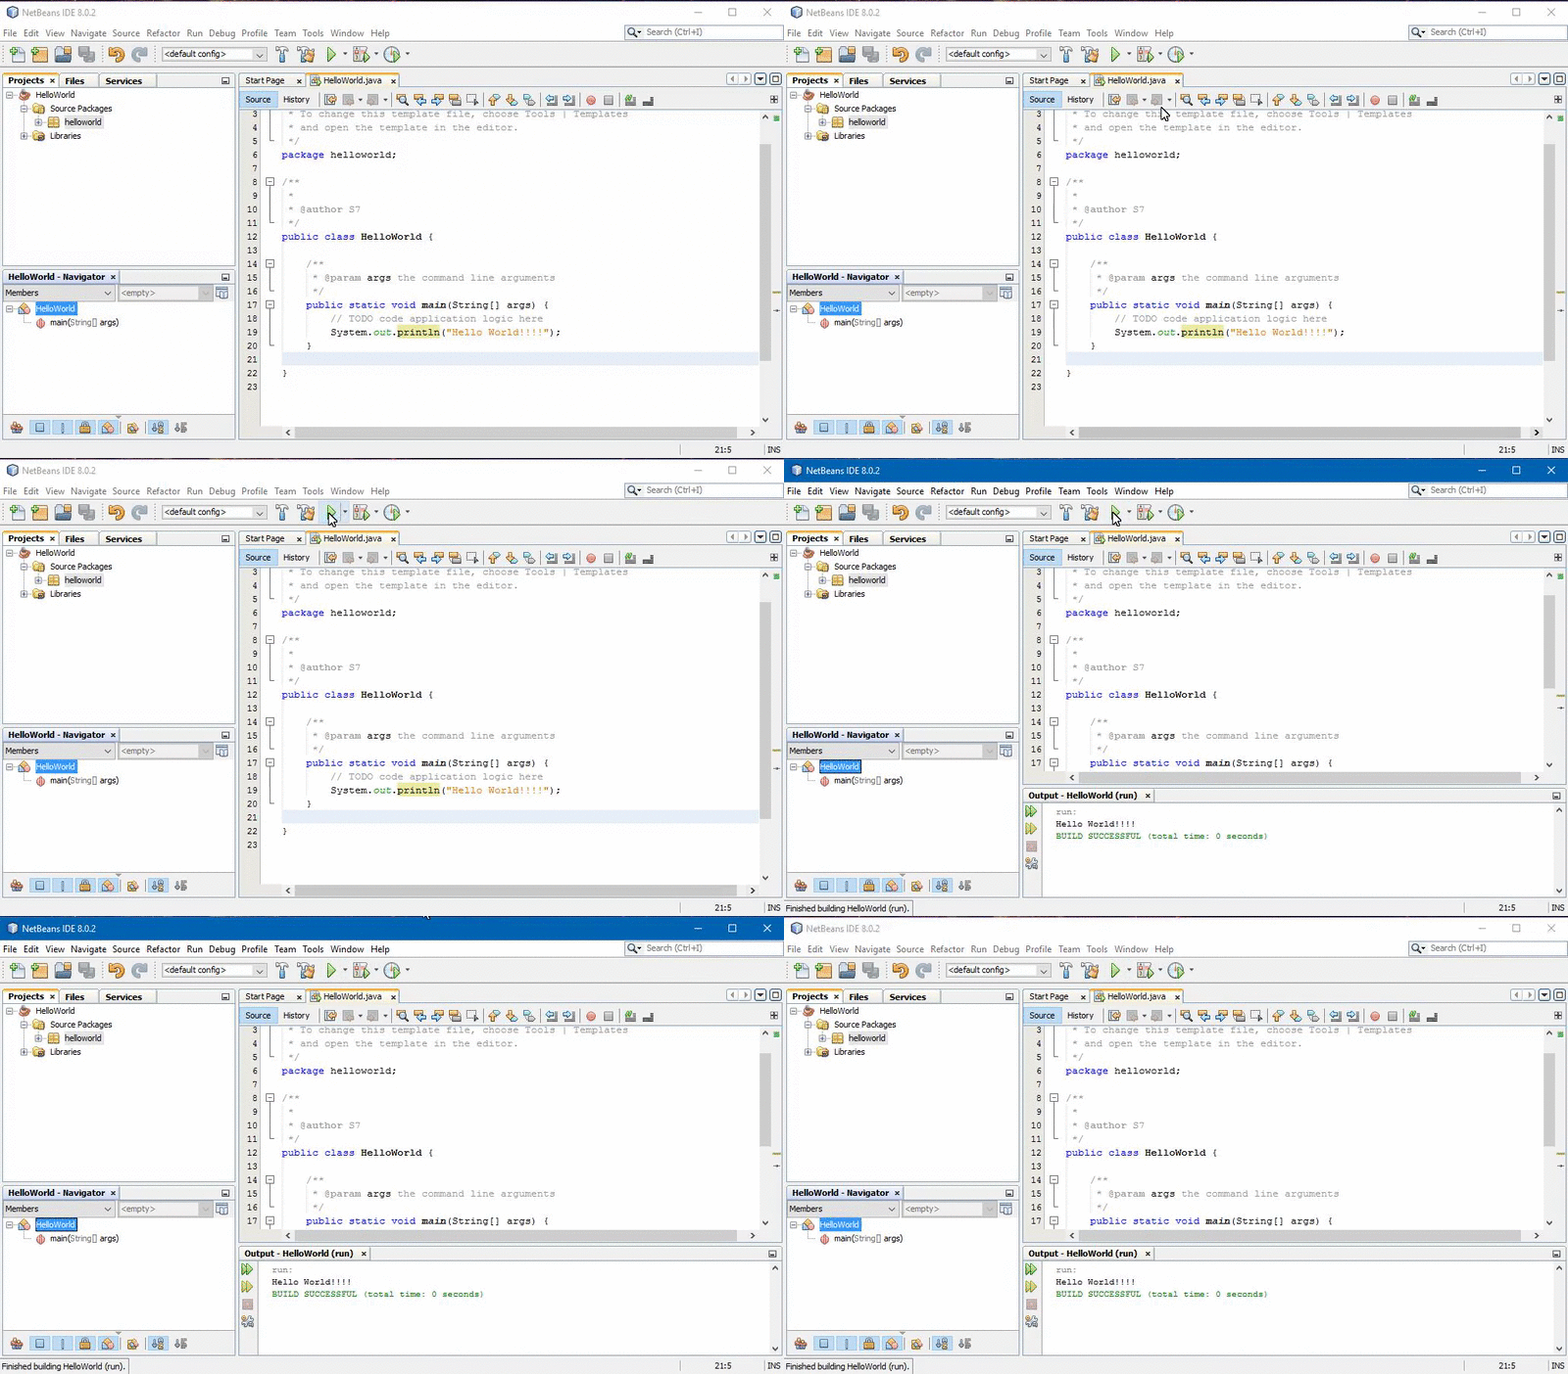
Alternatively, right-click HelloWorld in the Projects tab and choose Run.
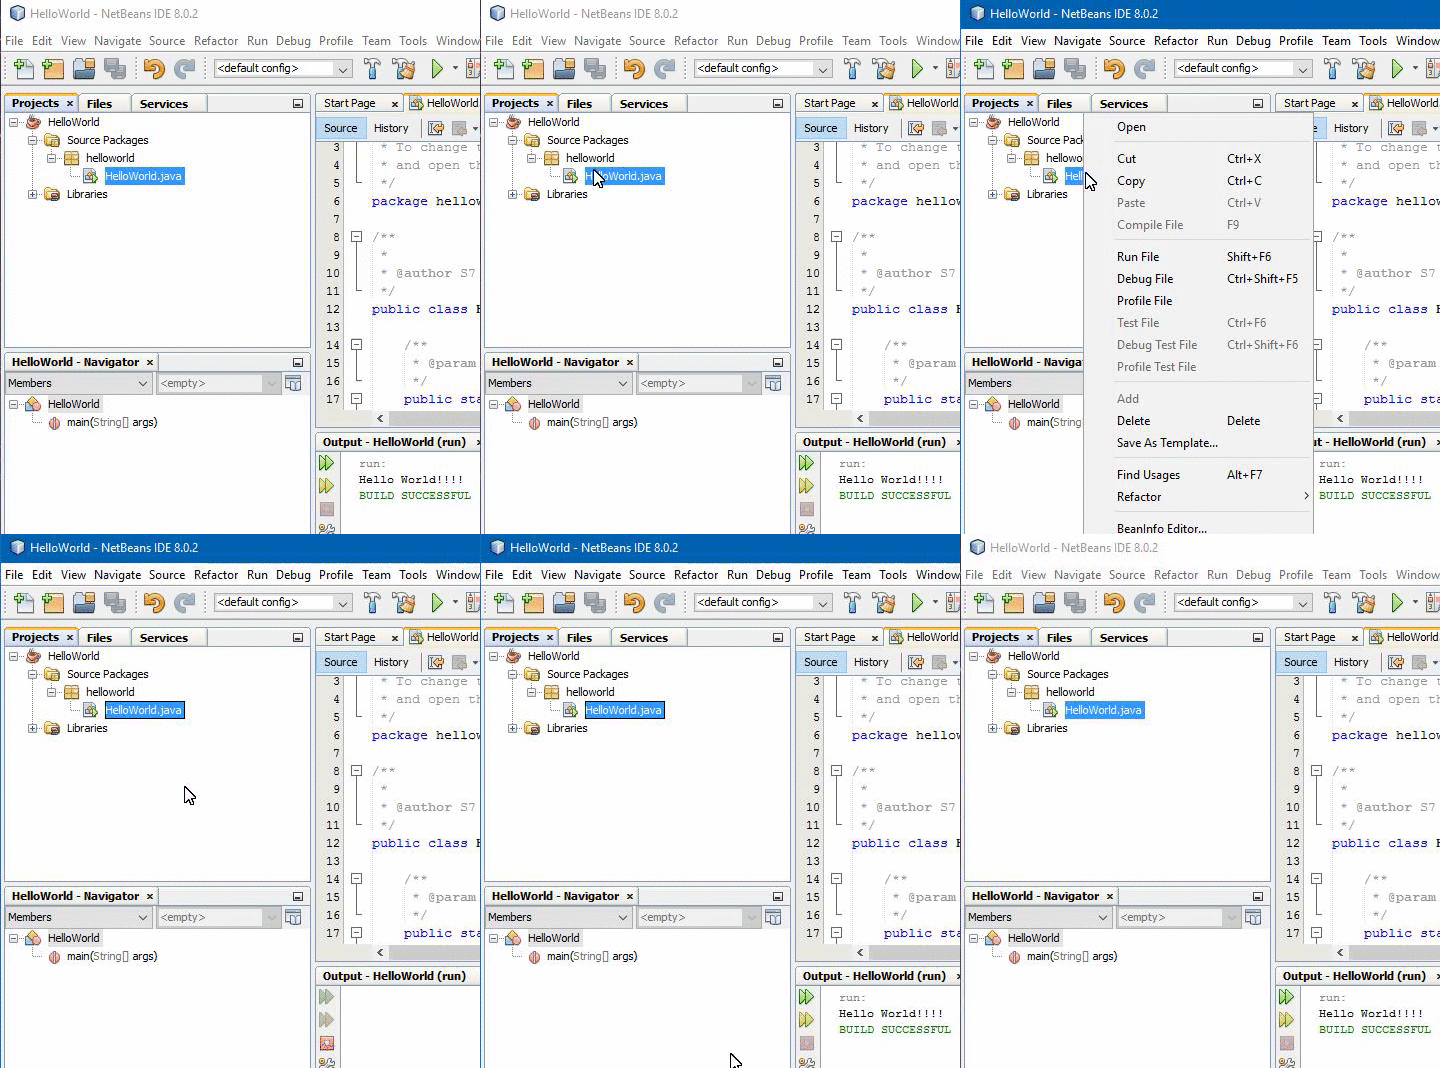
NetBeans compiles and runs the program. The Output tab shows Hello World!!!! in green text, followed by the execution time.
What each line of HelloWorld does
The program is short, but it contains 4 core Java concepts.
Class declaration
class HelloWorld {Everything between the opening brace { and closing brace } belongs to the class HelloWorld. This file defines one class, and that class holds the main method.
The main method
public static void main(String[] args) {Three keywords control how Java starts the program:
public: the method is accessible from other classes. Anymainmethod must be public so the Java interpreter can call it.static: no object of the class needs to be created before calling this method. It belongs to the class itself, not to any instance.void:mainreturns no value.
The parameter String[] args accepts command-line arguments. In HelloWorld, none are used, but the signature is always required.
The print statement
System.out.println("Hello World!!!!");System is a built-in Java class. Its out field is a PrintStream object. Calling println on it prints the string and moves the cursor to the next line. The alternative method print outputs the same string without the line break.
3 rules to keep in mind when writing Java code
- Java is case-sensitive.
Systemandsystemare different identifiers. - Every statement ends with a semicolon
;, with a few exceptions covered in later posts. - A single instruction can span multiple lines.
Keep reading in the Java for Zombies series
This post covers the skeleton of a Java program. The next posts in the series build on it: variables, data types, control flow, and then classes in depth.
If Java is part of a course or assignment you are working through, Java Assignment Help from working Java developers is available when you get stuck. Related posts in this series: Introduction to Java for Zombies (part one) and Exception Handling in Java (a common next topic after HelloWorld).
Related articles
-
 Java
JavaBus Ticketing System in Java Assignment
Bus ticketing system in Java, built from the assignment spec. 4 classes, seat grid, invoices, ban set, plus 3 bugs that erase saved data.
Jul 28, 2026
-
 Java
JavaJava Swing Tutorial for Beginners
Learn Java Swing from scratch: build your first window, wire button events, master five layout managers, and assemble a working calculator GUI.
May 24, 2024
-
 Java
JavaAdvanced Java Data Management Techniques
Master advanced Java data management: optimize data structures, handle concurrent access, tune memory, and use serialization and compression in real applications.
May 3, 2024