Programming
Git Branch and Merge: A Practical Guide
Git branch merging lets you consolidate work from separate development lines into a single codebase. Understanding when to merge, how conflicts arise, and how to fix them saves hours of debugging during collaborative projects.
git merge differs from git rebase in one key way: merging preserves the full commit history of both branches and creates a new merge commit that joins them. Rebasing rewrites history by placing commits from one branch on top of another, producing a linear sequence. This guide focuses on merging.
What Git branches are and why they matter
Git is a distributed version control system that tracks every change to a project, lets multiple developers work simultaneously, and supports rollback to any earlier state.
A branch is an independent line of development inside a repository. Changes on one branch do not affect any other branch until you explicitly merge them. This isolation means you can build a feature, fix a bug, or run an experiment without touching the main codebase.
Three things branches enable that matter most in practice:
- Concurrent development. Developer A works on the front end while Developer B works on the back end. Merging their branches later combines both sets of changes.
- Feature isolation. A new user-registration flow lives in its own branch. When it passes review,
git mergebrings it into main. - Safe bug fixing. A critical login bug is fixed in a dedicated branch. Merging the fix into main does not disturb any other in-progress work.
How to merge branches in Git
To merge feature-branch into main, run 4 commands in sequence.
Step 1: check out the target branch.
git checkout mainStep 2: run the merge command.
git merge feature-branchStep 3: resolve any conflicts (covered in the next section). Git pauses the merge and marks conflicted files when it cannot reconcile differences automatically.
Step 4: commit the merge.
git commit -m "Merge feature-branch into main"If there were no conflicts, Git completes the merge automatically after step 2 and skips steps 3 and 4.
Merge vs rebase: which to use
Both commands integrate changes from one branch into another. The choice affects commit history shape.
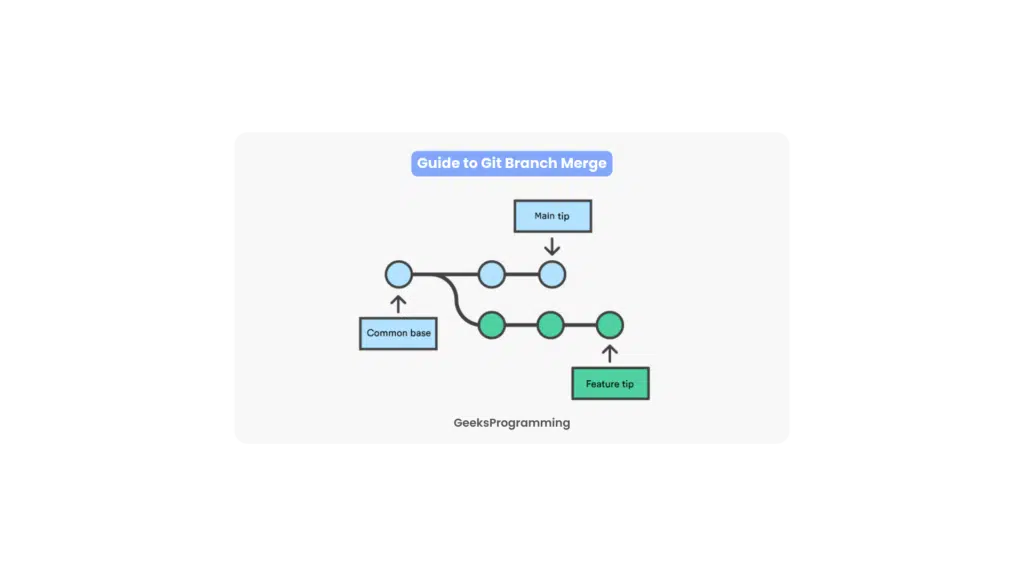
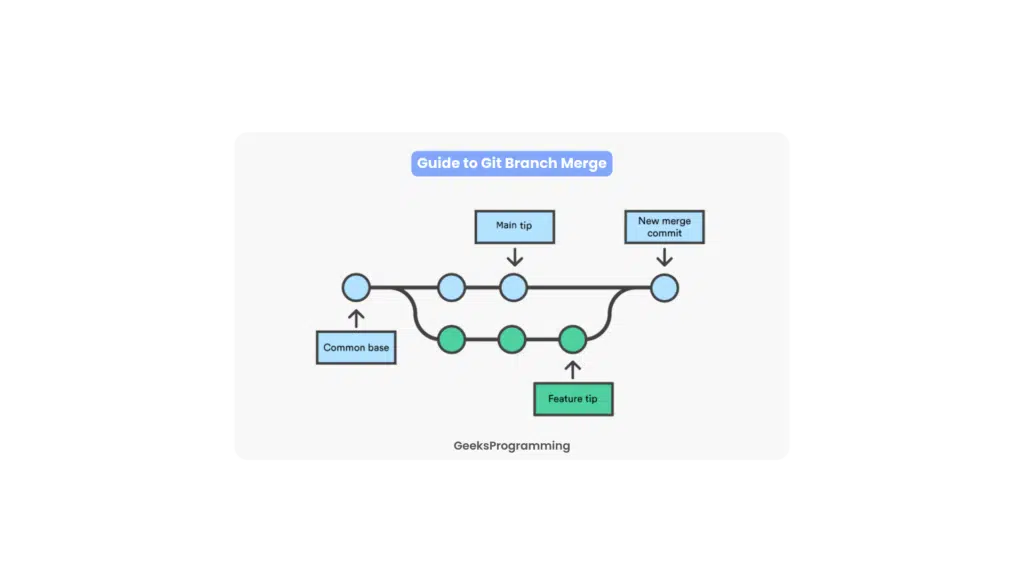
Merging creates a new merge commit that joins the two branch tips. The full history of both branches stays intact, so the timeline shows exactly when branches diverged and reconnected. Conflict resolution happens once during the merge.
Rebasing moves the commits from the source branch on top of the target branch tip, rewriting their SHA hashes. The result is a straight-line history with no merge commits. Conflict resolution happens once per replayed commit, which can mean many rounds if the branch has many commits.
When to use each:
- Merge when preserving branch context matters. Integrating a completed feature branch into main is the clearest case.
- Rebase when you want a clean, linear history on a personal branch or when you need to bring a long-running branch up to date with main before opening a pull request.
Do not rebase commits that other developers have already pulled. Rewriting shared history forces everyone else to reconcile their local copies.
Pros and cons at a glance:
| | Merge | Rebase | | --------------- | ----------------------- | ----------------------- | | Commit history | Branching, context-rich | Linear, compact | | Shared branches | Safe | Risky | | Conflict rounds | One | One per replayed commit | | Traceability | High | Lower |
Resolving Git merge conflicts
A merge conflict occurs when Git cannot automatically decide which version of a file to keep. Three situations trigger conflicts:
- Overlapping edits to the same lines. Two branches both modified the same section of a file.
- Delete-vs-modify. One branch deleted a file while another modified it.
- Divergent histories. Branches with large sets of differing changes applied to the same base can produce widespread conflicts.
How Git marks a conflict
When a conflict occurs, Git inserts conflict markers directly into the affected file:
<<<<<<< HEAD
// your current branch's version of this code
=======
// the incoming branch's version of this code
>>>>>>> feature-branch
HEAD is the version in the current branch. Everything between ======= and >>>>>>> is the incoming branch's version.
How to fix a conflict
Step 1: locate conflicted files. Run git status. Any file listed under "both modified" has a conflict.
Step 2: open each conflicted file in an editor. Find all conflict-marker blocks.
<<<<<<< HEAD
function login(user) { ... }
=======
function login(user, options) { ... }
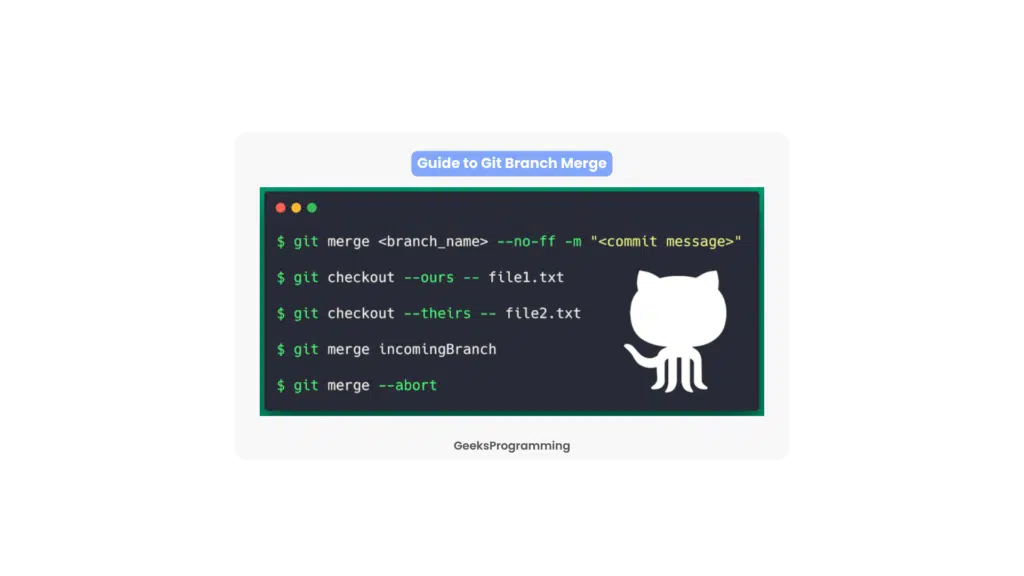
>>>>>>> feature-branchStep 3: decide what to keep. You have three options: keep only the HEAD version, keep only the incoming version, or combine both manually. Remove all 3 conflict markers (<<<<<<<, =======, >>>>>>>) from the file when done.
Step 4: test the resolution. Run your test suite before staging. A conflict resolved incorrectly compiles but breaks behavior.
Step 5: stage and complete the merge.
git add app.js
git merge --continue
Or use git commit if --continue is not available in your Git version.
Practical tip for teams
Talk to the developer who wrote the conflicting code before overwriting it. A conflict in business logic is a design decision, not just a text problem. Picking the wrong version silently discards someone else's intent.
Related programming resources
Managing version control is one part of writing maintainable code. Read Git Clone Into a Specific Directory for other Git workflows that reduce friction during project setup. For broader habits that reduce merge conflicts before they start, see 15 best practices for software development projects.
If you are working through a course that requires you to submit a Git-tracked project and need hands-on help, do your programming homework covers multi-language assignment support from developers who work with Git daily.
Related articles
- Case Study
Autograder Fixed in Under 24 Hours: 100/100
How our networking expert diagnosed a broken distance vector routing submission, fixed the output formatting bug, and delivered a 100/100 autograder score before the deadline.
Sep 2, 2025
- Programming
Can You Get Caught Using Someone Else's Code?
Yes, you can get caught. MOSS, JPlag, and Codequiry detect copied code even after renaming variables or restructuring. Here is what actually happens if you are.
Jul 17, 2025
- Programming
30+ Websites Every Programming Student Needs
The best forums, coding platforms, IDEs, debugging tools, and algorithm resources for programming students in 2026, organized by what each one actually does.
Apr 6, 2025